IOIO plugin
The IOIO is a board that provides a host machine the capability of interfacing with external hardware over a variety of commonly used protocols. The original IOIO board has been specifically designed to work with Android devices. The newer IOIO-OTG (“on the go”) boards work with both Android devices and PC’s. The IOIO board can be connected to its host over USB or Bluetooth, and provides a high-level Java API on the host side for using its I/O functions as if they were an integral part of the client. (IOIO website)
How to learn coding for IOIO
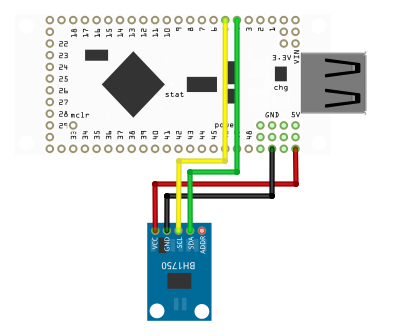
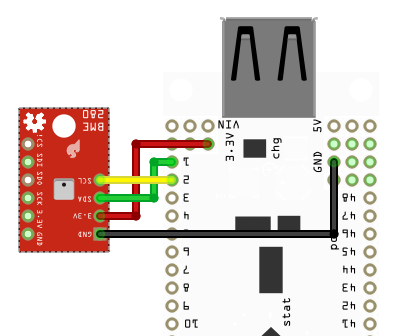
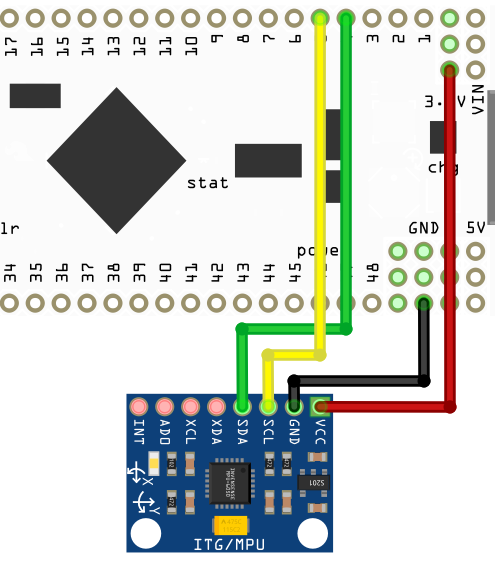
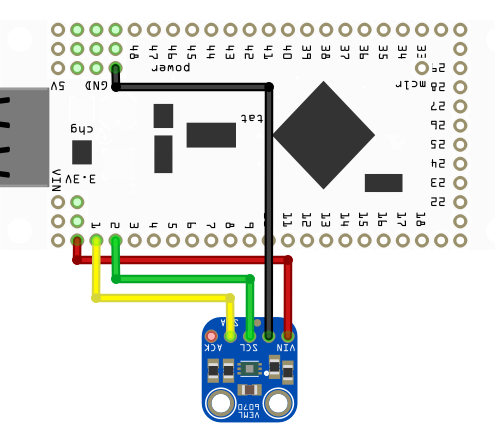
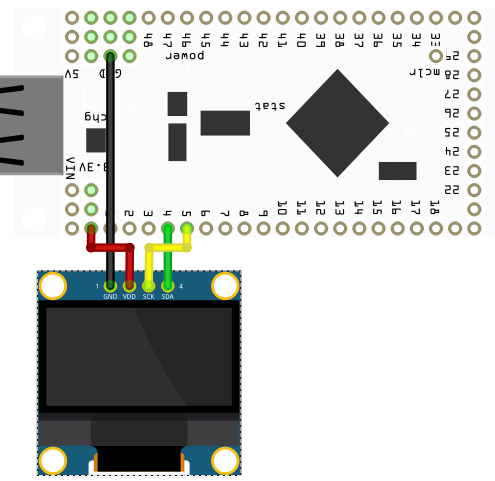
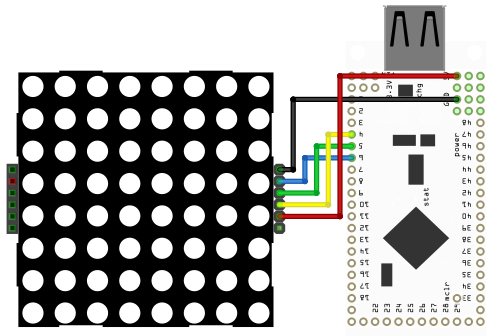
For most of the protocols you can find a SmallBASIC example at Github. Below is a list with all examples and an image how to wire. If you are new to IOIO it is best to start with the first example.
A simple SmallBASIC cheatsheet is available at Github.
For further information please visit the IOIO website.
How to setup SmallBASIC to use the IOIO plugin
Getting IOIO running on a PC (Linux) requires to build the plugin from source. This is not part of this document.
Using IOIO on Android is quite easy:
- Launch SmallBASIC and then click on “Setup”.
- On the second screen, click to “Load extension modules”.
- Restart SmallBASIC and then click “About”. You should see: “Extension modules: enabled”.
- If you have enabled Android developer options, make sure USB debugging is disabled.
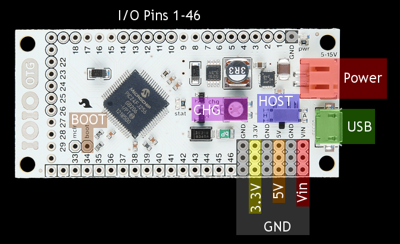
- On your IOIO-OTG board, connect a power source to the VIN + GND.
- IOIO should be powered by an external DC voltage source between 5V-15V.
- 9V battery works well.
- But it is better to connect a 5V power supply.
- Instead of VIN + GND you can use the 2-pin JST Female Power Jack
- Connect a USB cable between your mobile or tablet and the board (use the included red adaptor plus another cable).
- You should see “IOIO Standard application - no installed apps”.
- Launch “led.bas”
- You should see a prompt requesting permission for SmallBASIC to access the board. Click okay.
- You should then see a toast message: IOIO board access permitted.
- For this initial setup “led.bas” has now timed out. You should be able to re-launch “led.bas” for successful operation.
You have to connect power to the board, because it will act as an host and it will charge your Android device.
Examples
Digital output
LED
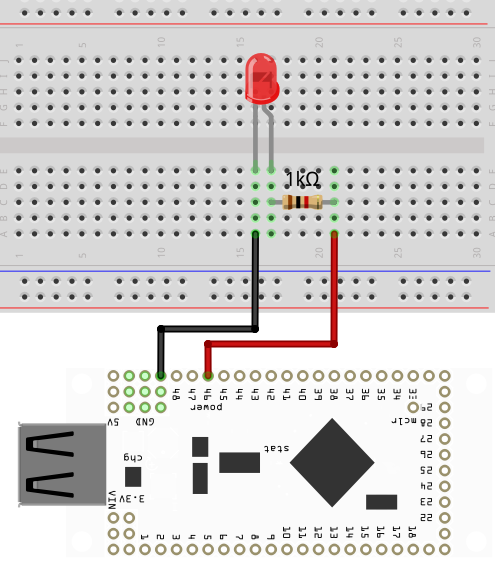
PWM
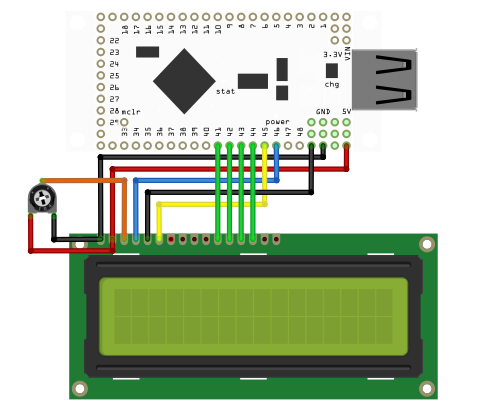
HD44780 text display
Digital input

Analog input
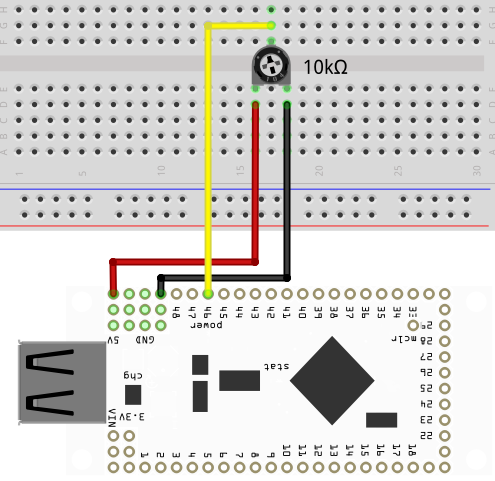
I2C
BH1750 - Ambient light sensor
BME280 - Temperature and humidity sensor
MPU6050 - Accelerometer, gyroscope and temperature sensor
VEML6030 - Ambient-light sensor
SSD1306 - OLED with 128x64 monochrome pixels
SPI
1088AS - 8x8 dot matrix module
ST7789 - TFT controller
SPI is too slow on IOIO to drive a TFT display.
ST7735 - TFT controller
SPI is too slow on IOIO to drive a TFT display.